Green Grams Stew

Green grams are also referred to as mung beans. They have many health benefits and are widely grown and consumed in various parts of the world.

They are a common meal on my table not just because of their nutritional value but because they are easy to cook and can be served with many of my other favourite main dishes.

For this meal, we will need:

  • 1/4kg boiled green grams
  • 3 carrots
  • 3 tomatoes
  • 1 large onion
  • Garlic, either crushed or finely chopped
  • 1 bell pepper
  • 1 cayenne pepper
  • Garam masala/ground cumin seeds
  • Royco (optional)
  • Salt

Preparation:

  1. Heat oil in a sauce pan then saute the onions for three minutes.
  2. Add the garlic, bell pepper and cayenne pepper and cook for another three minutes.
  3. Add the garam masala or cumin seeds and carrots. Mix well then cook for one minute.
  4. Add the chopped tomatoes and salt and cook until the tomatoes are done.
  5. Add the boiled green grams then mix. Let them cook for five minutes so that all the ingredients combine well. Mix royco & water in a bowl and pour it in for the soup.
  6. Serve.

Health Benefits of Green Grams


Green grams or mung beans supply many nutrients to the body. They provide proteins which assist in the production of blood cells and antibodies that protect the body from diseases. They aid in repairing worn out tissues and in helping the body perform vital functions like transporting molecules.

Green grams also provide the body with fiber that helps in digestion thereby preventing constipation, as well as lowering the amount of bad cholesterol in the blood. They also supply iron required for transporting oxygen to various body parts and improving the energy levels.
Green grams are rich in other minerals like calcium, sodium, magnesium, zinc, phosphorous and potassium. These nutrients aid in bone development and density. They help in maintaining strong teeth and reducing the chances of high blood pressure and colon cancer.

Green grams also provide Vitamins B, C & K. Vitamin B helps improve the performance of the immune system and in metabolism. It takes part in the development of new blood cells and helps improve the appearance of the hair and skin.
Vitamin C helps protect the body from infections. It assists in reducing the risks of high blood pressure by ensuring adequate supply of blood to vital body organs, that is, the brain, heart and eyes. Lack of Vitamin C in the diet causes cataracts, a condition affecting the functioning of the eye lens. 
Vitamin K, the other important nutrient provided by green grams, is used in the production of proteins. It helps in development of bone density and assists in blood clotting.

Nutritional Health Benefits of Coconuts

There are many benefits of coconuts both financially and nutritionally. They are vastly found growing naturally in coastal areas. The trees are usually tall and slender with no branches making them difficult to climb for inexperienced persons. Notches are made on the trunk so that one uses them to reach the top.

The entire coconut tree is very useful, from the coconut fruits to the trunks and leaves. However, the part most useful for health purposes is the coconut fruit.

Coconut Milk
The fruits are used to extract coconut milk, popularly known as tui in East Africa. The white fleshy part of the coconut can be eaten as it is. It could also be grated and from it coconut milk produced. The milk is very nutritious and has many health benefits. It is widely used in making snacks, confectioneries and other baked foods. It makes them more delicious and gives a yummy taste.

Grated coconut is mixed with some warm water to make coconut milk. It can be stored for longer periods of time in a refrigerator and used when need arises. It is used a lot in cooking rice dishes, stews and cereals among others.

Coconut milk is a good source of minerals, fiber and vitamins. Studies in modern science have shown that coconuts aid in digestion and the absorption of nutrients. They help in healing ulcers, throat infections, urinary truck infections and gum related diseases.

Coconut Oil
Traditionally, grated coconut was left to dry then used to produce coconut oil. This is still practiced in some parts of the world where the grated coconuts are dried by continued exposure to sunlight. It has a distinct smell that differentiates it from other oils and can be used for cooking, beauty and medical purposes.

Coconut oil is believed to possess many healing properties. It has been used for many years to treat skin infections, rashes, bruises, lice and earaches. A small drip is put into the ear to reduce pain. In some parts of the world it is applied to wounds and has been viewed as a very valuable healing agent.

Coconut oil is widely used for beauty purposes. It can be used on its own and applied to the skin or it can be mixed with other beauty products. It softens the skin and helps reduce dryness and flaking. It is believed to protect the skin from ultraviolet rays from the sun. It also helps in making the hair look more beautiful and healthy and prevents dandruff.

In addition, coconut oil is used in cooking and studies have shown that it contains low levels of cholesterol. It is therefore a healthy oil and reduces the risks of heart diseases. It also aids in tissue healing and repair, and protects against kidney diseases.

Coconut Water
Coconut water is different from coconut milk. Coconut water is the colourless fluid found inside the fruit while coconut milk must be made from the while fleshy parts of the fruit. Coconut water or madafu is mostly drank when the coconut has not fully ripened to be grated.

It is a refreshing drink and is rich in potassium and sodium. It also helps in boosting energy levels. It is not alcoholic and can be drank by anyone including children. The top part of the coconut fruit is normally chopped off and a drinking straw inserted. It is very common to see tourists enjoying the drink whenever they visit the coastal regions.

In conclusion, coconuts are highly nutritious and afford many benefits to the body, both inside and out. Fresh coconuts provide more of these benefits than canned ones.

How to Make Kenyan Chapati

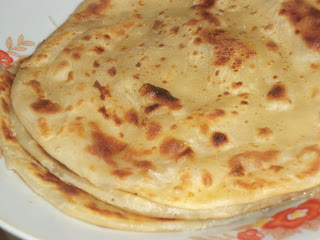
Chapati is very common not just in Kenya but other countries although it goes by different names. It is a flat bread prepared using wheat flour. It is usually served in many occasions and celebrations. It is not difficult to prepare but one needs practice in order to get the right measurements of flour and water.

Ingredients:

  • 3 cups flour
  • 1 1/2 cups warm water
  • Salt
  • Oil

Preparation

  1. Add flour to a large bowl and add salt. Mix well.
  2. Add the water and mix to form a smooth dough. Knead it and if it is too sticky add a little more flour. 
  3. Add oil to the dough and continue kneading until the oil is evenly spread and the dough does not stick to the hands.
  4. Using a knife, cut the dough into a handful and form a ball. Make balls with the entire dough and place them on a floured tray or surface.
  5. Sprinkle flour onto a rolling board or flat working surface. Taking one ball of dough at a time, roll them using a rolling pin to a circular shape.
  6. Using a spoon, drip oil around the dough and spread evenly. Take the edges and fold to form a coil then to a circular ball as shown below. Let them stand for a few minutes.

 7. Place a frying pan or heavy bottomed skillet on heat and warm it. In the meantime, take one dough and roll out on a floured rolling board or flat working surface. Spread it into a circular shape.
8. When the frying pan or skillet is hot enough, transfer the rolled out dough onto it. Cook for about two minutes then move it around the pan without turning over.
9.  Cook for another two to three minutes then turn over and cook the other side. In the meantime, take another ball of dough and roll out like the first one.
10. Using a spoon, spread oil evenly onto the chapati on the skillet then turn over and do the same to the other side. Cook for a minute then remove from heat. Repeat the procedure for the remaining dough.

The oil is necessary not only for nutritional purposes but also to make the chapatis soft and manageable while cooking. Too little oil can leave the chapatis dry and hard. Do not use a lot of salt.

They are usually served with any type of stew, soup or vegetable dish. They can also be served  with other dishes like rice or pilau especially during feasts. They are very popular in restaurants and hotels where one can have them with tea.

Beef stew with Okra

It goes without saying that there are many ways of cooking beef. Stew is one common method and is popular all over the world. The stew includes many other ingredients and vegetables which all add to the flavour and nutritional benefits.

In order for the beef to be tender, you may need to boil it first before making the stew. Boiling also ensures that the meat is fully cooked and therefore no risks of illnesses caused by partly cooked meat.

Ingredients:

  • 1/2 kg beef
  • 5 pcs okra
  • 3 peeled potatoes
  • 1 large onion
  • 4 tomatoes
  • 3 pcs crushed/finely chopped garlic
  • 3 pcs carrots
  • 1 finely chopped pepper (optional)
  • Oil
  • Salt 
  • Royco/curry powder
  • Garam masala/cumin seeds

 Method:

  1. Put cut beef cubes in a sauce pan/sufuria and boil till tender, about thirty minutes. You can either boil till water evaporates or drain the beef broth and add it to the stew later instead of plain water.
  2. Pour oil to the dry beef then add onions and cook till onions are browned.
  3. Add the crushed garlic and garam masala or cumin seeds and cook for a minute.
  4. Add the pepper, carrots,okra,tomatoes and potatoes and cook for ten minutes.
  5. Add royco and broth or enough water to make the stew. Cover and boil for five minutes.
  6. Taste and add salt to your liking then simmer for another five minutes till the potatoes are done.
  7. Serve.

Garlic Spiced Deep Fried Potatoes

In Kenya, viazi karai (deep fried potatoes) are very common. They are cooked in restaurants, homes and roadside vendors. They are highly favoured not only for their deliciousness but also for the fact that they are very simple to prepare.

Viazi Karai are typically made from Irish potatoes. These are readily available everywhere & I’m sure you can easily get them wherever you are.

Viazi Karai (deep fried potatoes) can be eaten for breakfast or as a mid-day snack.

How to Cook Viazi Karai

The cooking process involves boiling potatoes until they are cooked but still firm, and then deep frying them. It is a simple process and takes a few minutes to prepare. You can also opt to boil the potatoes with the skin on after thoroughly washing to remove any soil particles.

Once cooked (but not crumbly), the potatoes are peeled and immersed in a specially prepared batter. The batter’s consistency and spiciness plays a vital role in the final taste of the food.

The batter can be prepared by simply mixing water, a little salt and wheat flour. Then add one or more spices as you please.

Garlic Spiced Deep Fried Potatoes

In this recipe, we will add crushed garlic to the batter. You will need to prepare the batter as you boil the potatoes. Note that the potatoes should never crumble. They must retain their shape.

These are the ingredients you will need.

Ingredients:

  • 4 medium-sized potatoes
  • 1 1/2 cups of water
  • Pinch of salt
  • 1/2 cup wheat flour
  • 4 pcs crushed garlic
  • A pinch of food colour

You should use a ratio of water to flour based on how thick you want the coat to be. The lighter it is, the shorter the time it will take to cook & the crispier it will be.

Method:

  1. After the potatoes are cooked but still firm, peel them and set them aside to cool.
  2. Mix all the ingredients thoroughly and make sure there are no lumps in the batter.
  3. Pour enough oil in a deep frying pan and heat it, but don’t let it get too hot.
  4. In the meantime, cut the potatoes into your desired shape; cubes, oval pieces etc.
  5. Once the oil is hot enough but not smoking, immerse the potatoes into the batter and coat all the sides.
  6. Deep fry the pieces until the batter coating is cooked. Do not use very high heat.
  7. Once well cooked, remove the viazi karai and place them on paper towels to drain off the excess oil.
  8. Serve.
Garlic Spiced Deep Fried Potatoes with Amaranth leaves

These super delicious garlic spiced deep fried potatoes can be served alongside homemade sauces like tamarind sauce, tomato sauce or pepper sauce. Try them with any sauce of your choice.

Viazi karai may be cooked in the morning & served for breakfast over a cup of tea, coffee or hot chocolate. A glass of fresh juice will also go down pretty well with this snack.

Equally, you could serve with stir-fried vegetables to get more nutrients. As you can see from the above picture, the garlic spiced deep fried potatoes have been served with stir-fried amaranth leaves. They make a great accompaniment.

How to Cook Kunde/Cow peas Leaves


Cow peas or black eyed peas are commonly referred to as Kunde in Swahili. Their green leaves are cooked like other vegetables except that a number of people prefer boiling them first.

Boiling makes the leaves tender and easily digestible. There are a number of ways of cooking them. For instance:

1. Once boiled, oil is added to a sauce pan to saute onions for about three minutes. The drained cow peas leaves are added and cooked for a few minutes to absorb the oil and onion and to get more flavor.

An advantage of this simple way of cooking is that the leaves retain their natural flavor since there aren’t many vegetables added.

2. Another way of cooking them is adding more vegetables to make it more nutritious. Beef can also be added.

3. In some Kenyan communities, the leaves are boiled whole then after draining pounded/mashed instead of chopping them, especially if they are to be served to many people.

I will share a recipe that includes other vegetables but excludes meat.

Ingredients:

  • Chopped and boiled cow peas leaves- about 3 handfuls
  • 1 onion
  • 2 tomatoes
  • Garam masala
  • Crushed or finely chopped garlic
  • 2 pcs of okra
  • 1 bell pepper
  • Royco/ any other spices of your choice
  • Cooling oil & salt

Procedure:

  1. Saute onion and garlic in oil for about three minutes.
  2. Add the bell pepper and cook for a minute.
  3. Add the tomatoes and okra. Add also garam masala and any other spices of your choice (e.g tumeric, cumin, dhana jeera).
  4. After two minutes, add the boiled cow peas leaves and stir to mix all the ingredients. Cook for five minutes. In case you want to add royco, add to the sauce pan and simmer for five minutes.
  5. Taste for salt then serve.

The kunde/cow peas leaves are great served with chapati or ugali. They have a distinct taste that easily diferentiates them from other green leafy vegetables like kales/collards and spinach.

If you intend to cook together with beef, it is best to cook the beef in oil with onions and garlic before adding the other vegetables. This gives it more time to cook and adds flavor.

Nutritional Facts About Cow Peas/ Black Eyed Peas


Cowpeas are very common in African farm lands due to the fact that they can be cultivated in semi-arid areas with average or little rainfall. They are also referred to as black-eyed peas. They are legumes and have quite a number of health benefits.
Cowpeas are used in various dishes. They can be cooked as soups or as main dishes. They are known by many local names in various countries. They are also cultivated in the Americas and Asia. 
In many Kenyan and African communities, the leaves of the cowpea plant are used as vegetables. They can be cooked as a separate vegetable dish or cooked together with other dishes. In Kenya, the greens referred to as kunde are mostly cooked as a side dish with ugali/sima. They are also added to boiled maize and beans referred to as githerito make the dish more nutritious. 
The cowpeas leaves are a good source of Vitamins A and C. These vitamins help boost the immune system and act as antioxidants. It is the softer leaves that are harvested because they are tastier and easier to cook. They are cooked with tomatoes and other vegetables. Beef can also be included.
Cowpeas are a good source of proteins and fiber. They also provide potassium, calcium and carbohydrates. Therefore, due to the many health benefits of cowpeas/ black-eyed peas, they are very much recommended by health experts.

How to Cook Sossi Soya Stew

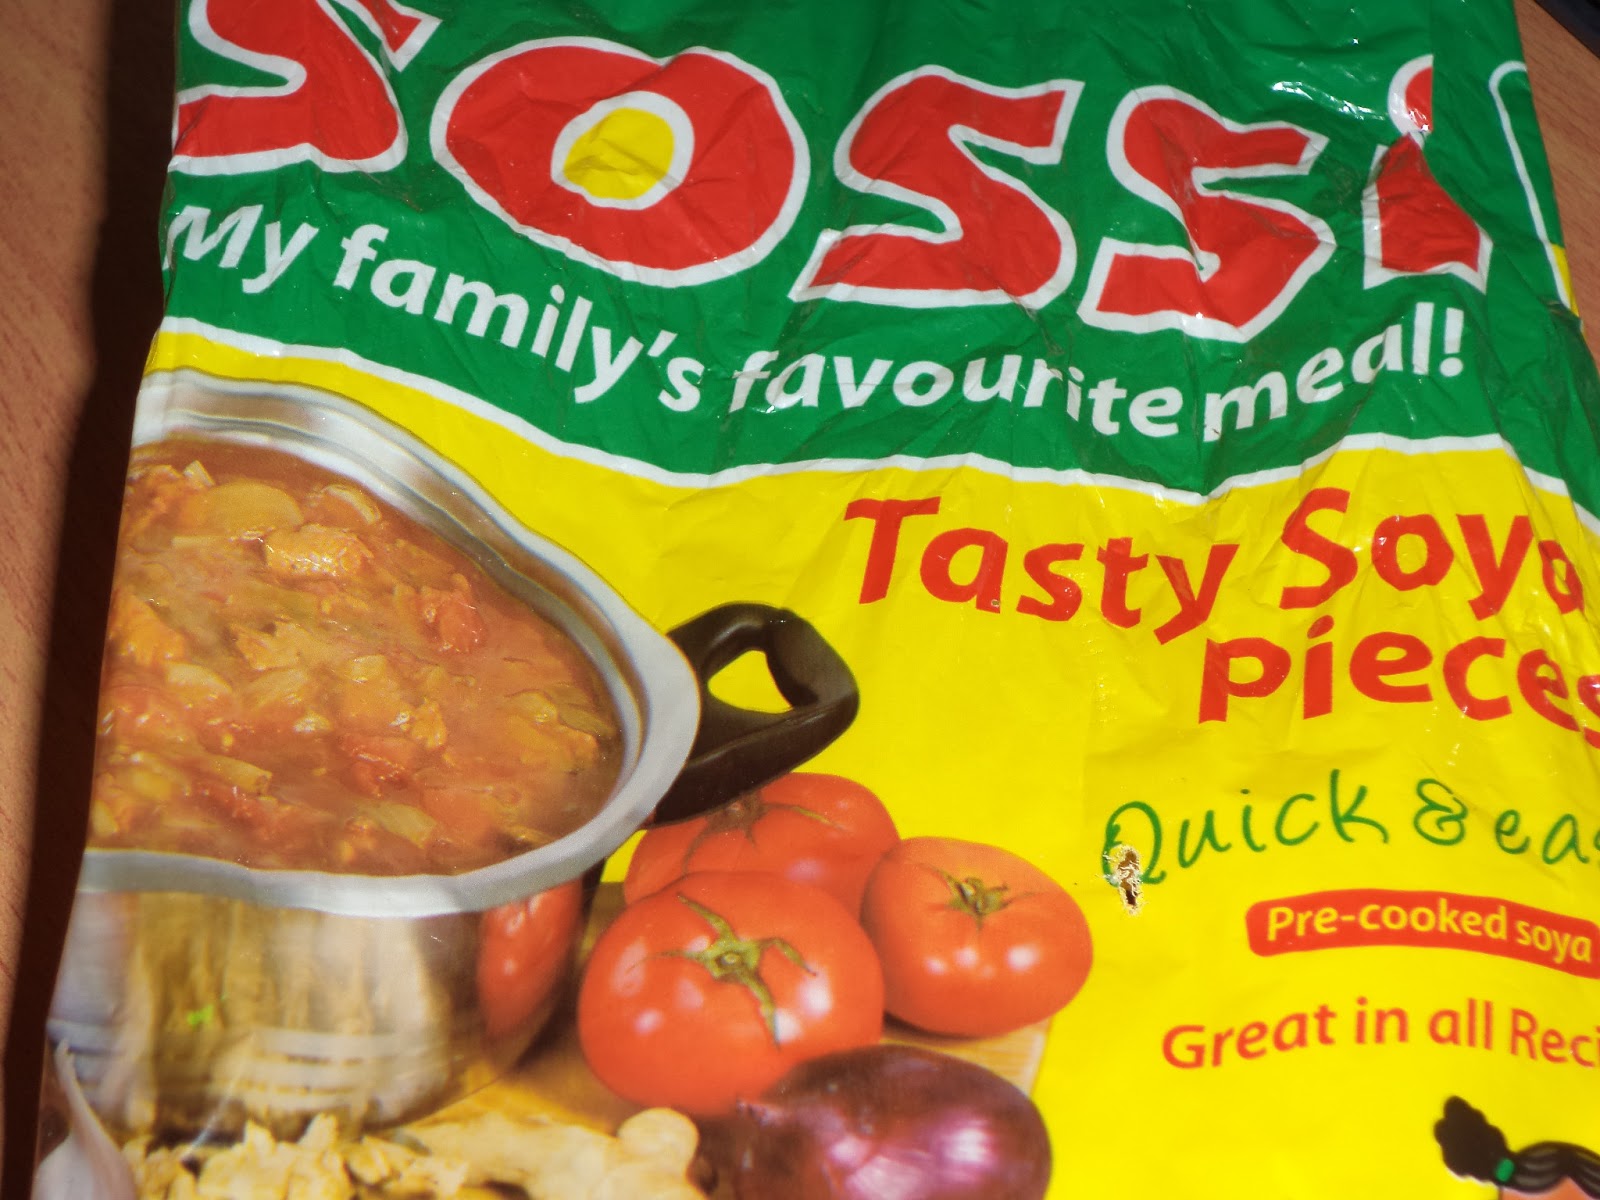
Sossi is a popular brand of soya pieces available throughout Kenya. I like the simplicity of the cooking procedure shown during the ad. However, adding a few more ingredients can make the dish more delicious as one of the best substitutes for red meat. It is a good source of protein and carbohydrates.
Sossi soya pieces package
Sossi soya stew

With the Sossi brand, once the soya pieces are cooked, they resemble real pieces of beef. They can be served with rice, chapatis or ugali. Another brand is Proya produced by the same company. The Proya type is minced soya that once cooked resembles real minced meat.

For either type, the following is a simple recipe I use for cooking them.

Ingredients: (Serves 3)

  • 1 cup soya pieces
  • 1 onion
  • 1 bell pepper
  • 3 pieces garlic (crushed or finely chopped)
  • 3 tomatoes
  • 3 pieces of chopped okra
  • Garam masala ( or coriander and cumin seeds powder) or Royco
  • Salt 
  • Cooking oil
  • Coriander/Dania (Optional)
  • Water (2 cups)

 Instructions:

  1.  Heat oil in a sauce pan then saute the onions till slightly browned.
  2. Add chooped bell pepper and garlic then cook for about three minutes.
  3. Add the tomatoes and okra and cook for about three minutes. If you intend to use dania/coriander, add it now.
  4. Add the garam masala or royco and mix well.
  5. After a minute, add the soya pieces (or minced soya) and cook on low heat for about five minutes. This is to allow the soya pieces absorb the flavours of the other ingredients.
  6. Before the food starts sticking to the sauce pan, pour in the water. Add salt then cook for about 15-20 minutes.
  7. Serve.

When cooking the minced soya (Proya), use less water if all other ingredients remain the same. Remember that all spices must be added before the soya pieces and water because the soya will need to absorb the delicious flavours from them.

How to Cook Arrow Roots/Taro/Dachine


(Image courtesy of Google)

This arrow root recipe is simple to prepare and takes a short time. Arrow roots are tubers also referred to as Taro in a number of Asian countries or Dachine. Most countries have their own unique name. It is commonly called nduma in most Kenyan market places.

Some variations from other countries may look different from the image above, but the recipe I am about to share is prepared using the above type. The tubers have to peeled, washed and cut into chunks.

In many households, the tubers are boiled and served over a cup of tea for breakfast. They are very nutritious and contain lots of starch like potatoes. You will usually notice this as you peel them.
The boiled arrow roots can be served with beef stew or vegetables for a quick lunch or dinner.

The following recipe shows how to cook fried arrow roots which I find tasty and easy to prepare.

Ingredients: (Serves two)

  • 1 large onion
  • Oil for frying
  • 4 large Arrow roots- peeled, washed and cubed
  • 2 cups of water
  • Royco 
Procedure:
  1. In a sauce pan, heat the oil and saute the onions till translucent.
  2. Add the bite sized pieces of arrow roots and stir
  3. Cook on medium heat making sure that the arrow roots do not stick to the bottom of the sauce pan. Cook for about ten minutes.
  4. In a bowl, add one and half spoons of Royco to the water. Stir then pour into the sauce pan.
  5. Boil for a few minutes then check for salt. Add to your liking.
  6. Continue cooking until the arrow roots are done. Check with a fork.
Note that the water does not have to be completely absorbed by the arrow roots. Adjust the level of water depending on whether you would like to have the dish dry or with some soup. 
If dry, you can prepare some beef stew or vegetables spinach. It is best to serve the dish hot.

1 2 3 4 5 6